Frequently Asked Question
How do I navigate a Windows computer?
Use this article to learn the basic parts of a Windows computer screen and how to navigate between common applications. This article explains the desktop, Start/search area, taskbar, common application icons, and the buttons used to minimize, resize, or close a window.
Audience: Students, Employees, Faculty, Staff, or All Users
Estimated Time: 5 minutes
Steps
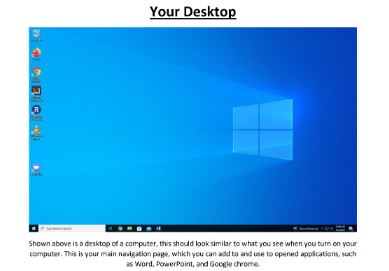
Step 1: Understand the desktop
The desktop is the main screen you see after turning on and signing in to your computer. You can use the desktop to open applications such as Word, PowerPoint, and Google Chrome.
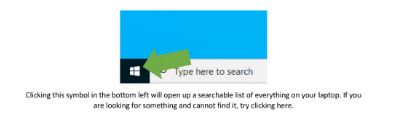
Step 2: Use the Start/search button
Click the Windows symbol in the bottom-left corner of the screen to open a searchable list of items on your computer. If you are looking for something and cannot find it, try using this button or the search box.
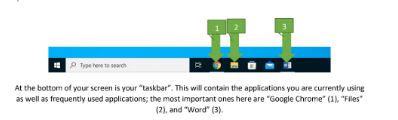
Step 3: Understand the taskbar
The taskbar is located at the bottom of your screen. It shows applications you are currently using and may also show frequently used applications.

Step 4: Use common applications
The taskbar may show common applications such as Google Chrome, Files/File Explorer, and Microsoft Word. Google Chrome is a web browser used to search the internet, find sources, look up definitions, and find answers to questions. Files/File Explorer is used to find saved items on your computer, including Word documents, pictures, downloads, and other saved files. Microsoft Word is used to create digital documents, such as essays and typed assignments.
Step 5: Use window controls
When you open an application, it may cover most or all of your screen. Use the symbols in the top-right corner of the application window to control what happens to that window.

Step 6: Minimize a window
The minus symbol minimizes the application. This sends the application down to the taskbar so you can bring it back later. Think of this like placing your work in a drawer. It is out of your way, but it is still safe and easy to reach.

Step 7: Resize or restore a window
The two-box symbol changes the size of the application window. This can make the window smaller so you can see other applications or the desktop behind it. Think of this like moving your work to the side so you can still use it while looking at something else.

Step 8: Close a window
The X symbol closes the application. If your work is not saved, closing the application may cause you to lose your work. Only close an application when you are finished or when your work has been saved.

Need More Help?
If this walkthrough does not resolve the issue, please contact Lake Land College IT Support.
Phone: 217-234-5261
Submit a ticket: Open an IT support ticket
Search Terms
The following search terms may help users find this walkthrough:
- computer navigation
- basic computer help
- how to use a computer
- Windows desktop
- desktop screen
- Windows taskbar
- taskbar icons
- Start menu
- Start button
- Windows search
- search my computer
- find apps on computer
- open applications
- Google Chrome
- Files
- File Explorer
- Microsoft Word
- minimize window
- close window
- resize window